
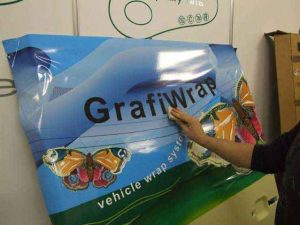
How is the Vehicle Wrapping done?
If wrapping a vehicle with a digital print, the print should dry for at least 48 hours to ensure all solvent gases have evaporated (as explained previously) and that the print is then protected by the high quality cast laminate.
If the vehicle is new or has recently been resprayed, take care to ensure the paintwork/water based lacquer is sufficiently cured. This is an extremely important factor – failure to check this could result in paintwork peeling at the removal stage. A 6 week waiting period is required
for newly painted vehicles.
Tools of the trade – Requirements for vehicle wrapping
– squeegee with a felt strip at one side or a hard squeegee with a separate felt squeegee
– scalpel (cutter)
– heat gun with regulatory air pressure and temperature
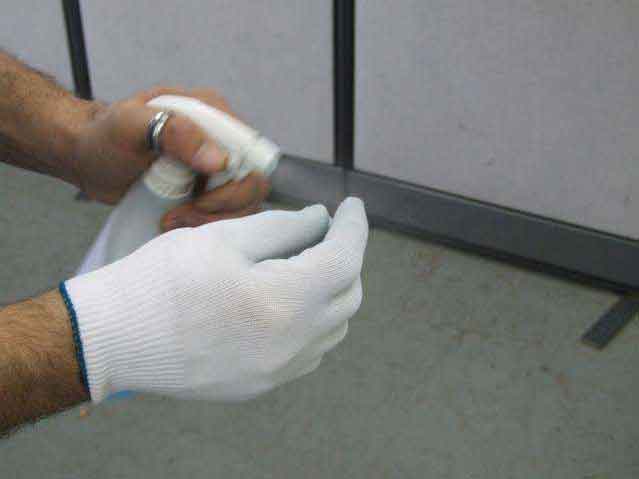
– soft, clean, fluff-free gloves
– good, non-aggressive degreasing agent and/or silicone remover
– isopropanol, ethanol or “Rapid Prep”
– primer
– cleaning cloths (of which the cleaning agent is not solvent based)
The ideal environment for wrapping is a well illuminated, dust free area with a constant temperature between 17°C and 24°C. The preparation of the vehicle includes the removal of number plates, window rubbers, mirrors, the antenna, etc…
Cleaning the vehicle
The vehicle should be cleaned a day in advance of wrapping. Why a day in advance? So that you can be completely sure that everything is completely dry, and that no water will run out from the rubber trims or the indents. We use isopropanol, ethanol or “Rapid Prep” for degreasing the vehicle. Pay special attention to deep recesses. A tissue wiped over a small area and discarded after short use will prevent silicones being moved around.
Tip : For degreasing areas that are hard to reach, please use a bit of isopropanol, ethanol or “Rapid Prep” on a cotton bud.
PS : when using a cleaning agent, please always follow the safety instructions, e.g. wearing a mask, gloves, etc…
Use of a primer
We advise the use of primer and recommend “Dow Corning 1200”. After the surface of the vehicle has been cleaned, the primer is applied only in the deep indentations. This will help the print adhere much better and avoid “pulling out” in difficult areas. The adhesive strength of the glue is raised by 25 % when using the primer!
Procedure:
Wrap a clean cloth around the index finger, and moisten the cloth.
Rub the indentation with the cloth, and wait for about 10 minutes until the primer is completely dry.
Then take a clean cloth and wipe over a couple of times to remove the white haze that has appeared during the drying process of the primer.
When the print needs to be pushed into an indentation, check immediately whether it is placed correctly and that there are no air bubbles or wrinkles. If it isn’t placed correctly, you will have to re-position it immediately (do not continue to apply the rest and try to remove possible air bubbles or wrinkles later).
If this procedure is not followed and you wait, even as little as a couple of minutes, it is likely you will pull the print loose, leaving the adhesive behind on the primer. The combination of the primer and the adhesive form a very strong bond.
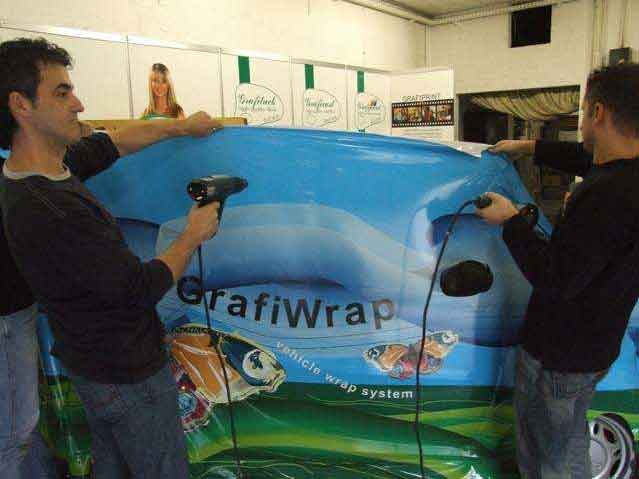
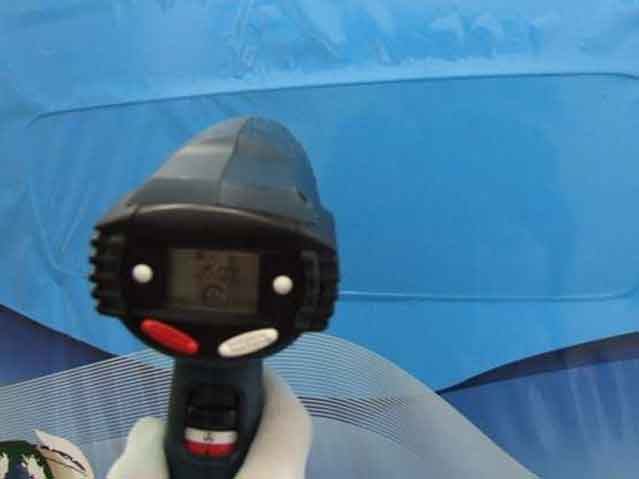
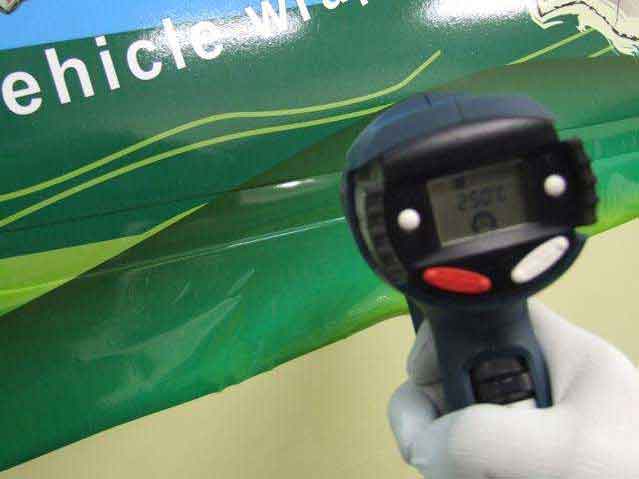
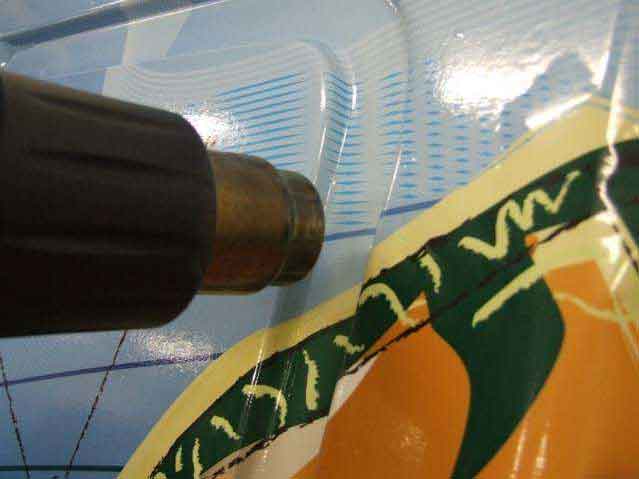
Temperature settings of the heat gun when applying the vinyl:
– for small sections : 250°C
– for large surfaces : between 450°C and 600°C
– for after-heating : 350°C
If you need to heat large surfaces, always make sure that the print is not heated too quickly.
You need to heat a larger part than the piece that needs to be applied, making circular movements.
APPLICATION (ALWAYS applied dry)
The print needs to be large enough to go beyond the seam towards which you are working. We take the Smart Car as an example.
The printed vinyl is now positioned on the vehicle. Make sure that the text or the design is positioned correctly on the vehicle.
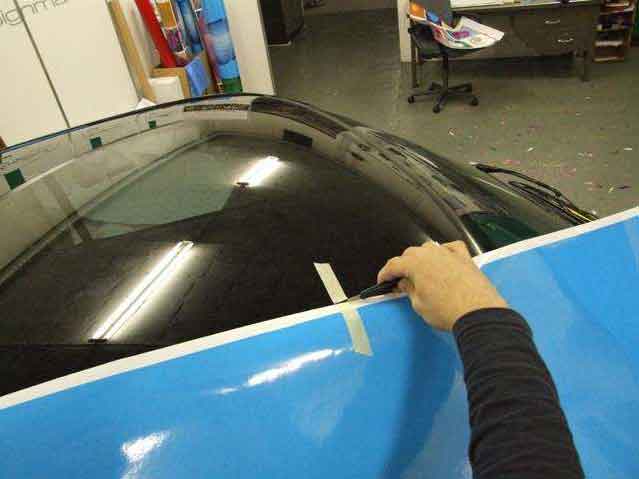
Secure the print to the roof by means of 2 pieces of tape. Cut the tape in half, and remove the backing paper completely. You are then left with a piece of tape on the vehicle and a piece of tape on the print, these are used as markers to position your print exactly where intended.
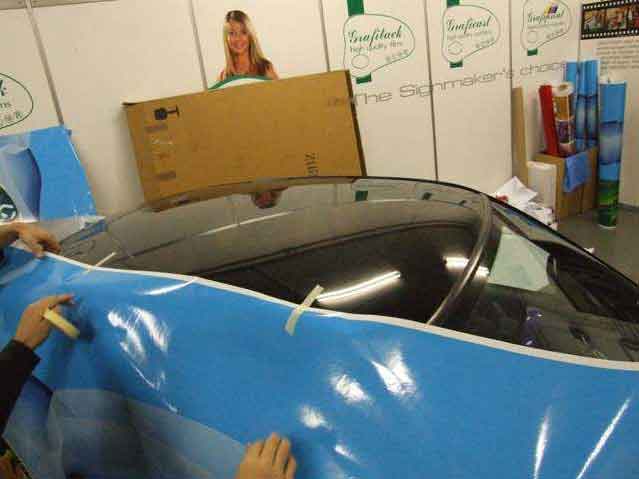
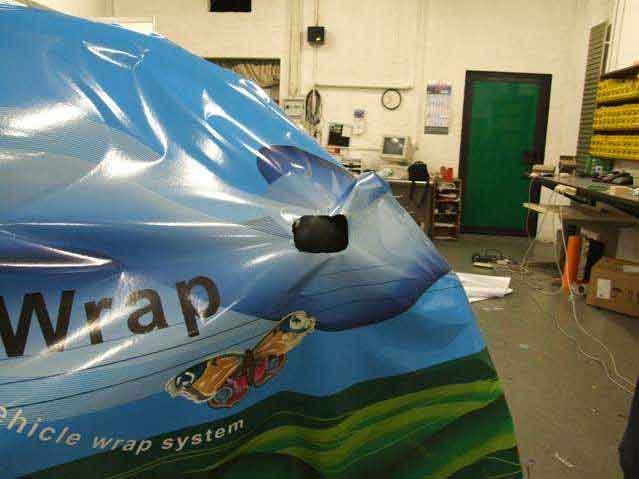
 When the vinyl is positioned again as intended, gently let the vinyl fall against the vehicle. First make sure that a hole/slit is cut at outside mirror height. Care should be taken not to make the hole/slit too big or there will be insufficient vinyl to apply around the mirror. To find a starting point for application, check at which height you can apply the longest strip of vinyl without having a doorknob or a key hole in the way.


At this height, you then begin by rubbing the vinyl from the centre outward by means of the felt squeegee. Continue in the same way upward and downward, always rubbing the vinyl from the centre outward. The felt squeegee is always used at an angle of ± 60° to the vehicle, keeping four fingers on the upper side. Holding the squeegee in this manner continue to rub over the vinyl. It is very important that horizontal movements made from the centre outwards always overlap each other.
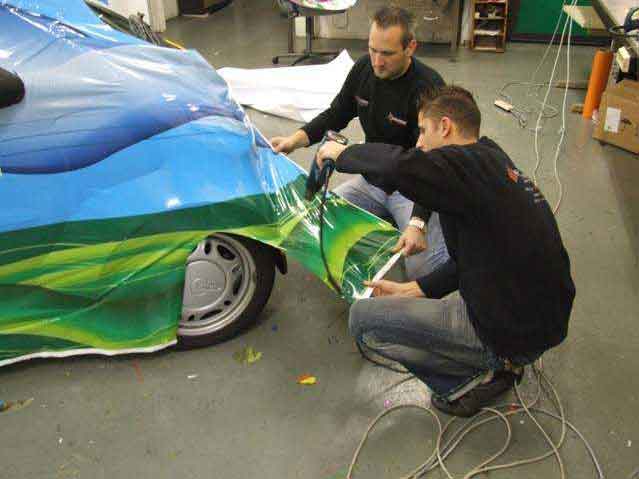
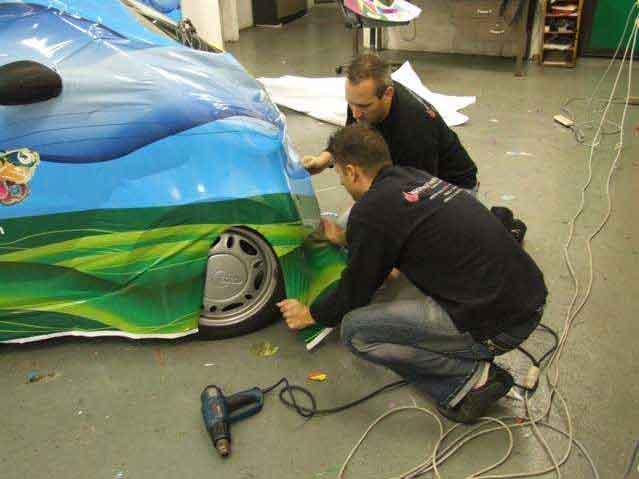
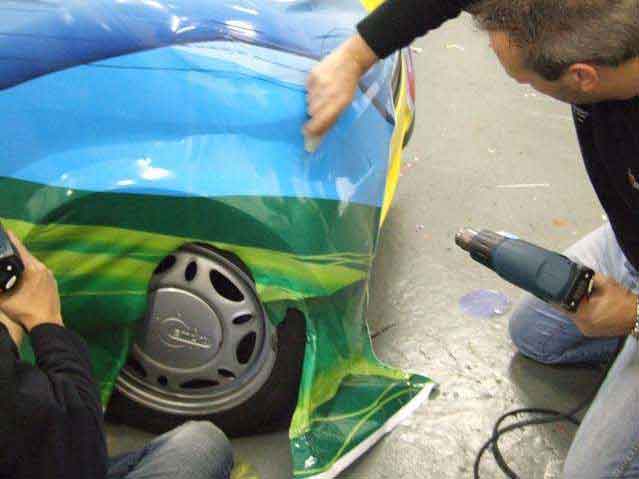
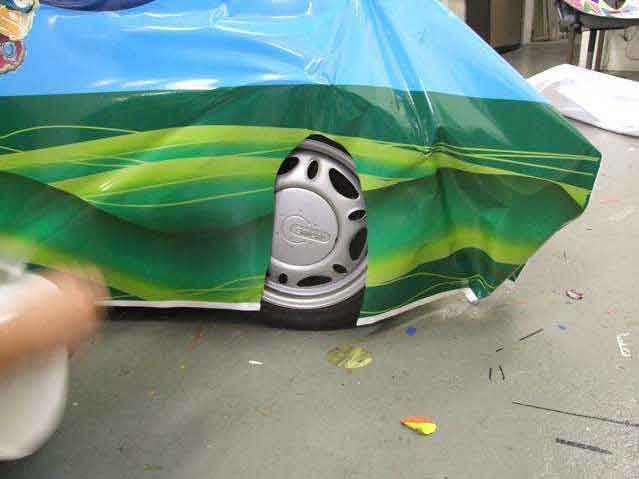 The pieces of vinyl that will not be applied on the vehicle can now be cut away. This will make further application much easier and take away the tension on the material. In a single smooth arched movement, the vinyl that is covering the wheels can also be cut away, taking care not to cut too much off so that it can be fitted snugly into the wheel arches.
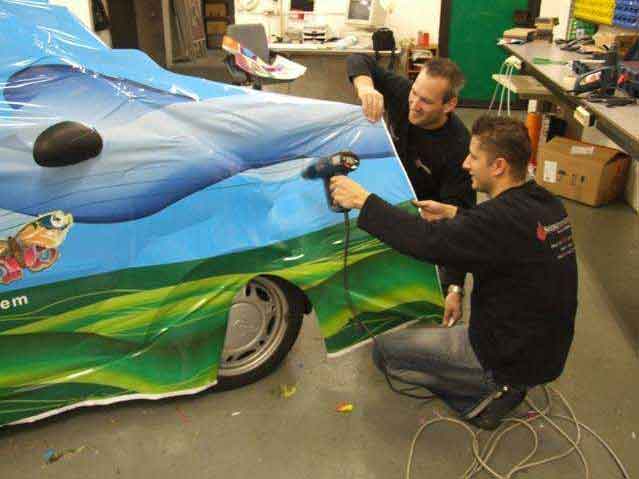
On reaching the bumpers the vinyl should be heated for a short time at 450°, over the largest possible surface. This should give enough pliability for the vinyl to be pulled easily over the bumper. If the vinyl is positioned correctly, rub it with the felt squeegee. If the vinyl is not positioned correctly, gently pull it loose, heat it so it returns to its original shape, and pull it over the bumper again.
 Difficult areas are always easier to apply if the vinyl is heated, but we advise you not to heat the vinyl if it isn’t necessary.When you start applying the vinyl over the upper border of the vehicle, you also have to heat the vinyl over the biggest possible surface (in order to divide the elongation and not to create too much tension on a small piece of vinyl), and then pull it over the border. Repeat this at the rear of the vehicle. Here the vinyl also needs to be applied far enough backward, beyond the bumper. When applying the vinyl over curved surfaces (such as the bonnet or the roof), always start applying it at the highest point of this surface (where the surface is bent the most, in most cases at the centre), and rub the vinyl from the centre (highest point) outward. If you didn’t (or couldn’t) remove the window rubbers, we advise you to work in the following way.
In order to see exactly where the rubbers are located (and possibly other edges of the vehicle), just explore the vinyl with your hands and press it firmly, so you can see the edges very well (or check the other side of the vehicle). This needs to be done at both sides of the vehicle.
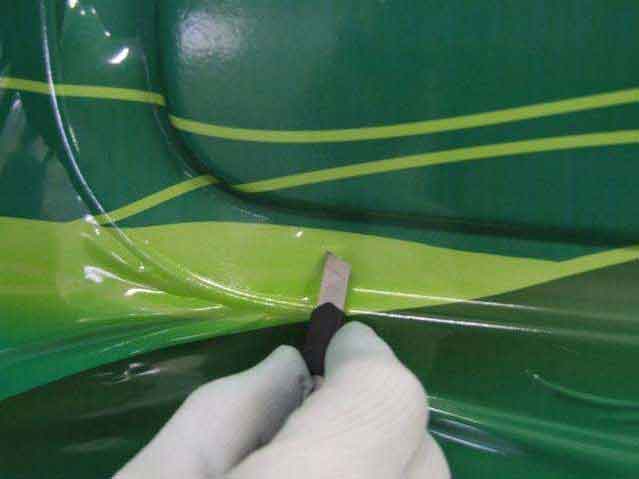
The superfluous vinyl is gently cut away here by means of a scalpel (cutter). When cutting away vinyl, it is very important not to stop while cutting, to ensure a single smooth cutting line. Leave enough vinyl to be able to rub it with the plastic squeegee and to make it disappear
under the rubber afterwards. If there are no window rubbers, make sure you rub the vinyl as far and as deep as possible into the indentation.
Important!
When applying the vinyl, it is important that you make sure that there are no wrinkles present in the vinyl. If you notice any wrinkles in the vinyl, gently pull it loose, heat it again, so the vinyl returns to its original shape, and re-apply. If there are air bubbles under the vinyl, you can easily remove them by making a small hole by means of the tip of a scalpel, and then gently pressing the air through the small hole.
!! Attention, you shouldn’t make holes in air bubbles that are located in the indentations. Otherwise, the small hole will become bigger and bigger, as the vinyl is under tension at this location. When applying the vinyl on the rear end of the vehicle (for instance the deeper part where
the number plate is situated), always make sure that the piece of vinyl is perfectly positioned when you remove the backing paper, so that the design is perfectly lined up with the parts you have already applied.
 For an excellent result, make use of the Application gloves!. First moisten the fingers that you will be using with soap suds. Then press the edges of the deeper part firmly with your thumb revealing its actual shape.
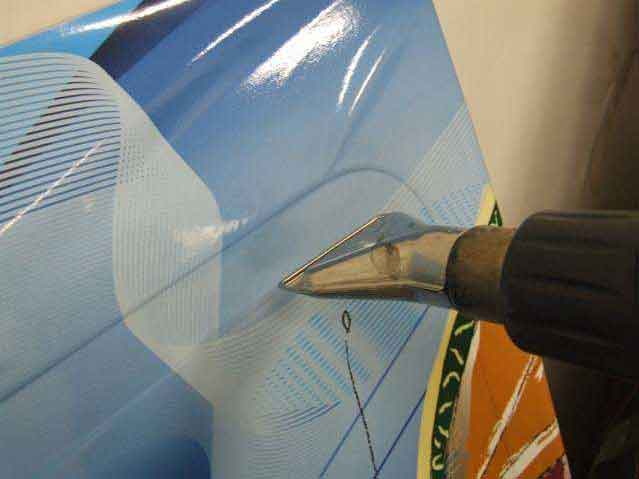
Heat the vinyl in such a way that all possible slight waves (tensions) disappear.
The deeper part of the indentation then needs to be rubbed in.
Heat the bottom part of the indentation at 250°C while doing so, and rub and press the upper
part into the indentation with your thumb. It is very important to do this gradually without
forcing the vinyl into the indentation all at once. This would simply result in ugly wrinkles or
poke a hole through the vinyl with your finger.
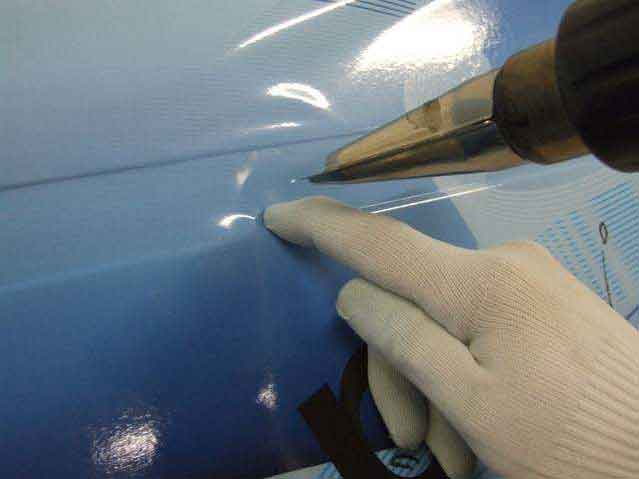
 Always heat the vinyl at the bottom edge of the indentation, and press the vinyl gently into the indentation. In this way, the vinyl is stretched over a flat part. If you heat the vinyl in the indentation during the application, you will stretch the vinyl in the indentation (in that case you will end up with less adhesive at the location where the adhesive is needed the most). The risk of the vinyl coming loose is the highest at the locations where the vinyl is under tension. The middle of the section of vinyl can now be easily pressed in by means of the felt squeegee. The superfluous air can easily be guided through the holes where the number plates are supposed to be attached. When everything has been applied and all parts have been firmly pressed, the vinyl should be after-heated in the indentations at a temperature of 350°C, following the indentation very slowly.
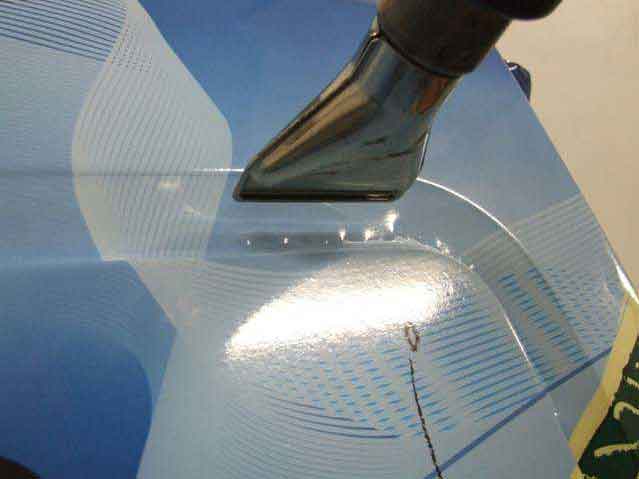
You need to work at a very slow pace and hold the heat gun close to the print. Procedure for applying the vinyl in double indentations (such as grooves on van panels):
! Attention !
When making the design, you should always bear in mind that you cannot have an overlap in an indentation ! ! ! !
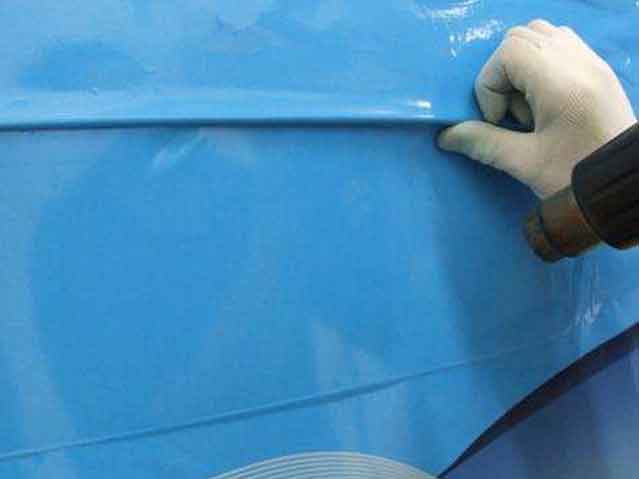
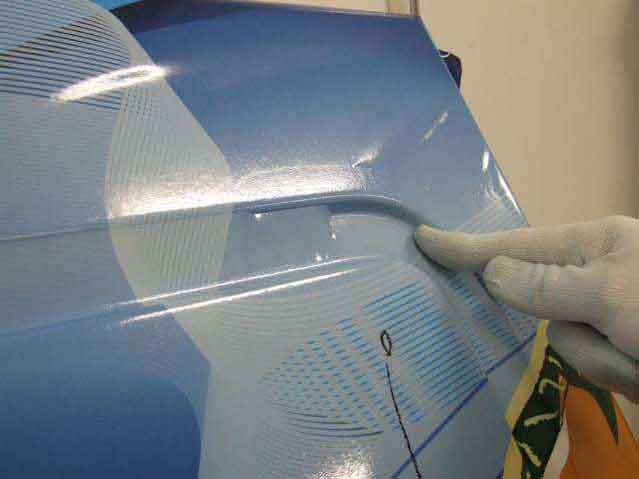
The vinyl is applied over the double indentation without being pressed in. Now press the middle part of the groove firmly with a squeegee.

Put on the gloves and moisten the fingers with soap suds – especially the index finger and the thumb. Then explore the groove with your fingers, so you can see the double indentation a little better, gently pressing the edges. Before continuing with application, place a squeegee between the surface and the print so that the air can escape while pressing the vinyl.

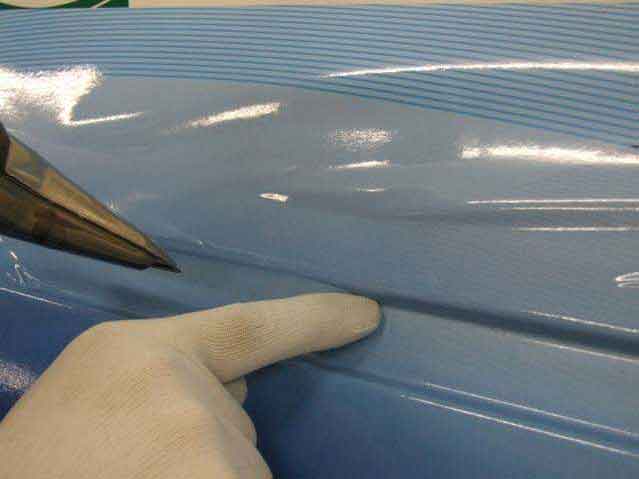
 First start pressing the vinyl at the inner side of the indentation! Start at the opposite side to the squeegee i.e. if the squeegee was placed at the left bottom, you begin at the right top, and then work your way down in both directions towards the left bottom. Before you start working the vinyl into the inner side of the groove, you should heat the complete groove so all waves disappear from the vinyl (250°C, having the heat gun blow only slightly).
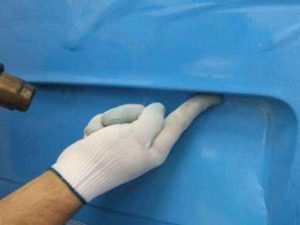
 It is extremely important that the vinyl is heated at the opposite side of the groove (by means of a special accessory – 250°C – air pressure at minimum). This means that the outer side of the groove is heated and that the inner side of the groove is gradually pressed.
 Why is this important?
Working In this way, the vinyl is not stretched where it is applied in the indentation (the vinyl stretches where it is heated).
Now the vinyl can be easily pressed a little deeper into the groove. This is repeated until all the vinyl is completely applied to the inner side of the groove.
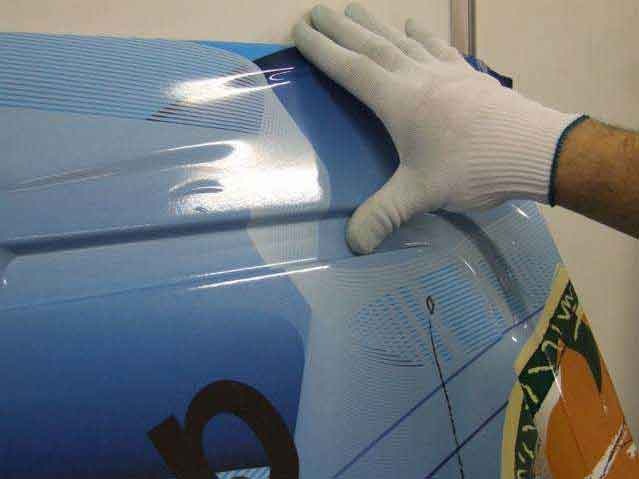
 Now the opposite edge can be applied on the outer side. The inner side of the groove needs
to be heated, so you can press the outer side of the groove. This is repeated until the vinyl is completely pressed into the outer side of the groove. Don’t forget to gradually press the centre part of the indentation as well. The squeegee is still located at its place in the bottom corner of the groove. Follow the same procedure for the remainder of the groove. Heat the outer side of the indentation and gradually press the inner side of the indentation.
Then heat the inner side of the indentation and gradually press the outer side of the indentation.

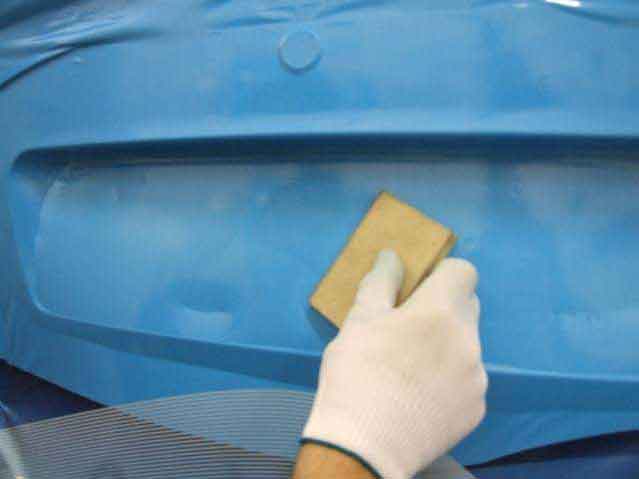
You will be left with an air bubble. Make a very small incision in the vinyl (never in the curve of
the indentation itself but in the flat part between the 2 curves), so you can rub the air from
underneath the vinyl. Heating this part a little makes the job easier.
Once the air is pushed gently through the small incision the area should be after heated at 350°C.
An Interesting Fact:
If after a few months or years you wish to remove the Wrap, you can do so easily WITHOUT leaving any adhesive residue.
Simply heat the vinyl slightly on removal – in less than two hours the vehicle will be back to its original state.
(If the printed media has been applied without a laminate or has been sprayed with varnish it will tear into small pieces on removal).
